Place Trades
Once a user has signed in and connected a brokerage, choose how to present and submit orders:
- Client side (embedded modal): use the React trade modal for order entry, review, and user approval. Your server supplies its authenticated session URL.
- Server side (your own UI): use the REST API to prepare an order, show it to the user, and submit it after explicit approval. See Trade through your server.
The embedded modal requires asset:read brokerage:read trade:write. Direct API trading requires trade:write tool:execute; add trade:read to read order status.
How It Works
- Your server requests an authenticated trade session URL.
- Your client-side app opens the trade modal via the SDK.
- You pass a trade configuration (simple or options/multi-leg).
- The user reviews and sends the order to their brokerage.
Server side: Request a Trade Session URL
Call Trade It's API server-side to get a url to the trade portal. The URL is pre-authenticated so the user does not need to log in.
Request
POST https://api.tradeit.app/api/session/url
Content-Type: application/json
Authorization: Bearer <user's trade it access token>

{
  "target": "trade"
}
Response
{
  "url": "https://tradeit.app/t/[ticker]?ti_token=ti:...&embedded=1",
  "expiresAt": "2026-02-27T19:35:12.000Z",
  "feature": "trade",
  "placeholder": "[ticker]"
}
Trade It returns an authenticated trade URL template.
Request a fresh template immediately before opening the modal. It expires after 30 minutes and should not be cached for reuse.
Implement POST /api/tradeit/trade on your server using this request. Require your platform session and CSRF protection, load and refresh the current user's Trade It token, and return the session URL response. Keep OAuth tokens on the server and exclude session URLs from logs and analytics.
Client side: Open the Trade Modal (Simple Trade)
import { useState } from 'react';
import {
  LegType,
  OrderDirection,
  OrderType,
  PositionEffect,
  TimeInForce,
  TriggerUnit,
  TradeAction,
  TradeItModal,
  TradeType,
  TradeUnit,
} from '@trade-it/react';

function BuyButton() {
  const [open, setOpen] = useState(false);
  const [tradeUrl, setTradeUrl] = useState<string | null>(null);

  async function openTrade() {
    const res = await fetch('/api/tradeit/trade', { method: 'POST' });
    if (!res.ok) throw new Error('Unable to open the trade modal');
    const data = await res.json();
    setTradeUrl(data.url);
    setOpen(true);
  }

  return (
    <>
      <button onClick={openTrade}>Buy/Sell</button>
      {tradeUrl && (
        <TradeItModal
          open={open}
          onOpenChange={setOpen}
          launch={{
            mode: 'trade',
            url: tradeUrl,
            config: {
              tradeType: TradeType.Simple,
              ticker: 'AAPL',
              action: TradeAction.Buy,
              amount: 100,
              unit: TradeUnit.Dollars,
              orderType: OrderType.Market,
              takeProfit: { value: 10, unit: TriggerUnit.Percent },
              stopLoss: { value: 5, unit: TriggerUnit.Percent },
            },
          }}
        />
      )}
    </>
  );
}Note: The same modal supports options orders too. Pass a multi-leg config and Trade It opens directly into the options workflow with details prefilled.
Examples
Use these examples of common scenarios as jumping off point.
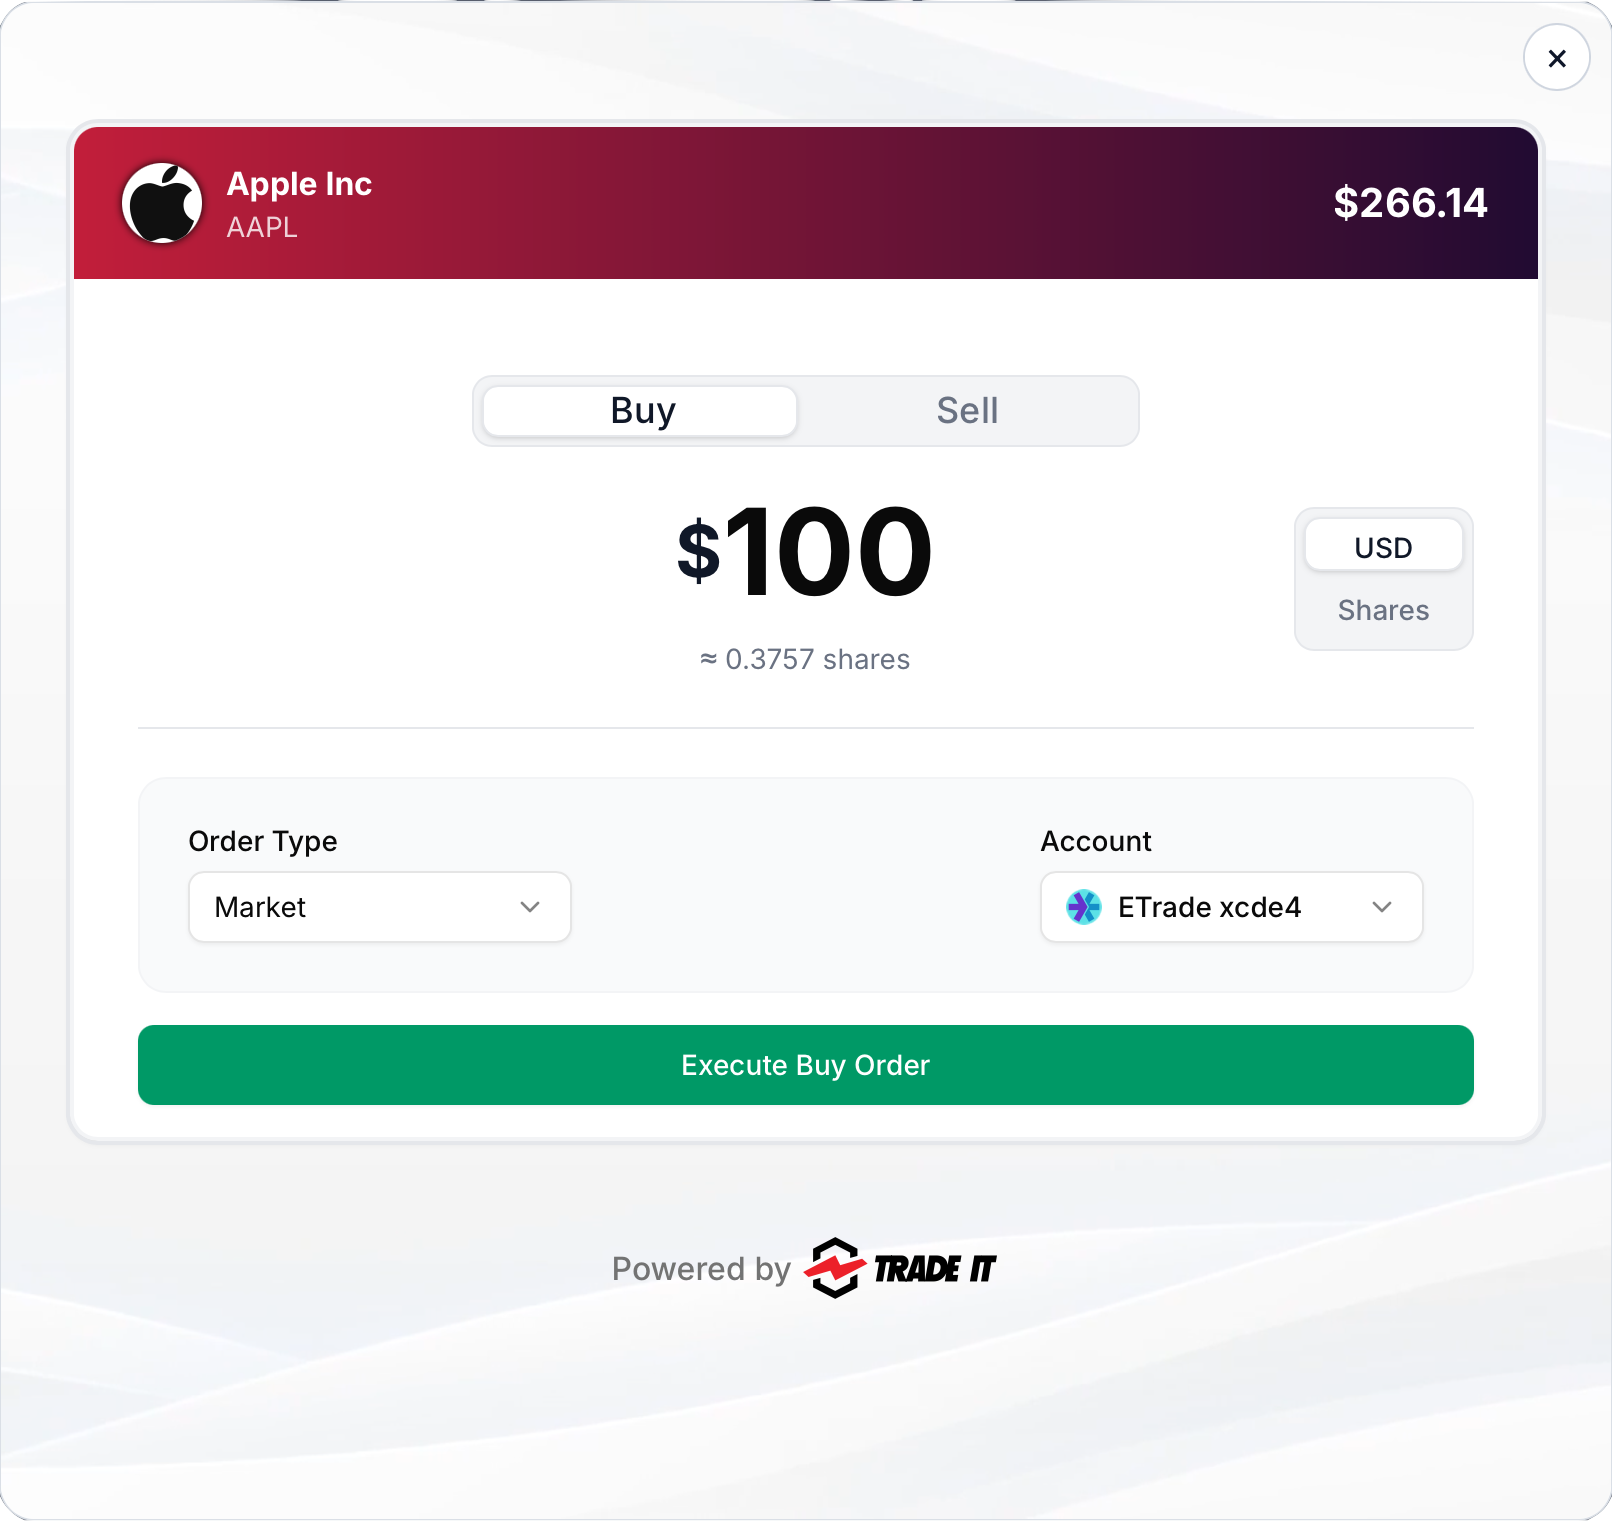
Example 1: Buy in Dollars
Buy shares of an asset.
tradeIt.openTrade({
  launch: {
    mode: 'trade',
    url: tradeUrl,
    config: {
      tradeType: TradeType.Simple,
      ticker: 'AAPL',
      action: TradeAction.Buy,
      amount: 100,
      unit: TradeUnit.Dollars,
      orderType: OrderType.Market,
      takeProfit: { value: 10, unit: TriggerUnit.Percent },
      stopLoss: { value: 5, unit: TriggerUnit.Percent },
    },
  },
});
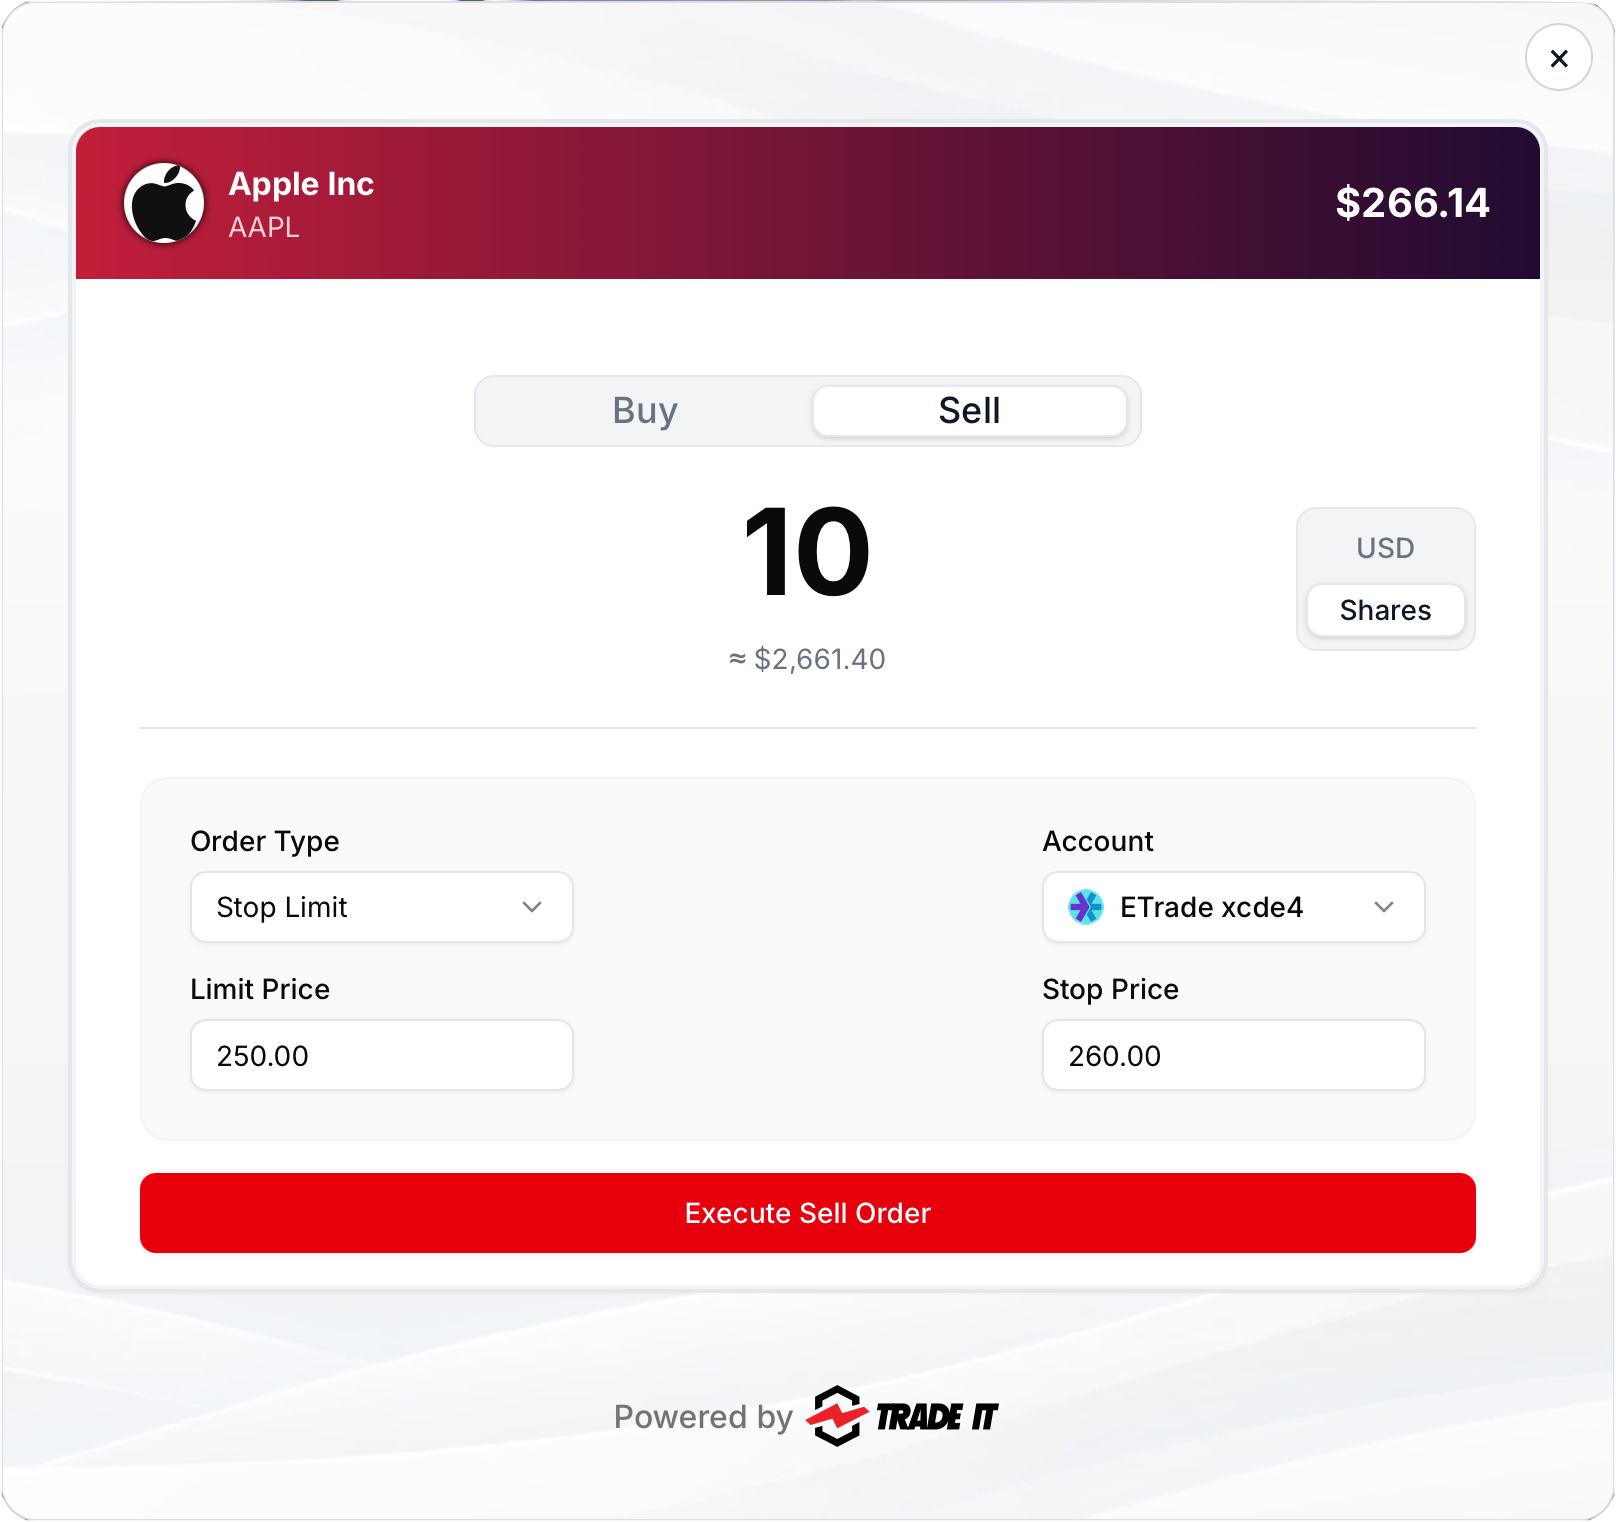
Example 2: Sell in Shares with Stop-Limit
Sell shares while setting both stop and limit prices.
tradeIt.openTrade({
  launch: {
    mode: 'trade',
    url: tradeUrl,
    config: {
      tradeType: TradeType.Simple,
      ticker: 'AAPL',
      action: TradeAction.Sell,
      amount: 10,
      unit: TradeUnit.Shares,
      orderType: OrderType.StopLimit,
      stopPrice: 260,
      limitPrice: 250,
    },
  },
});
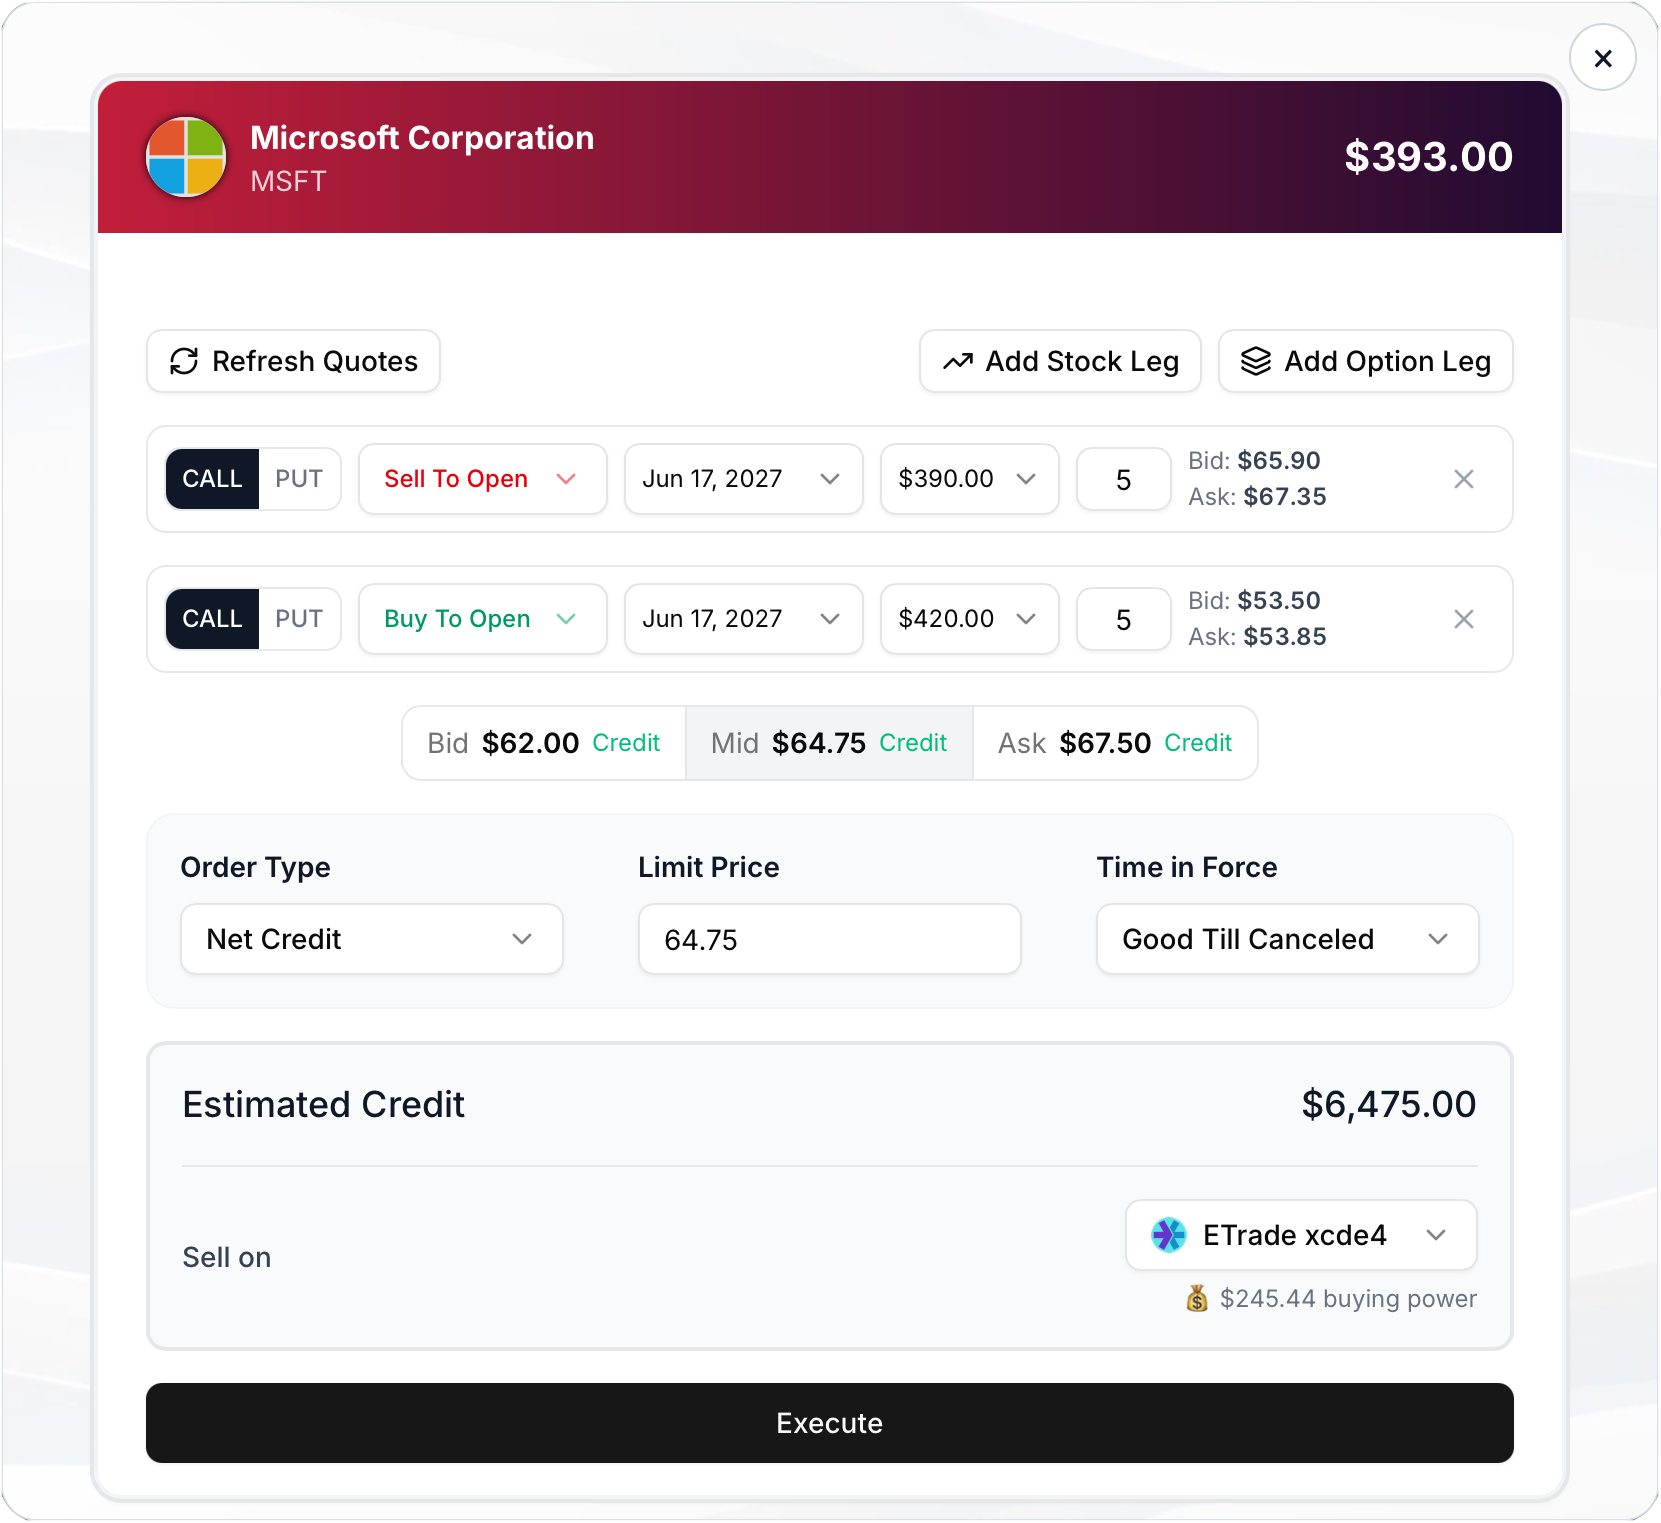
Example 3: Multi-Leg Options
Open a debit spread with prefilled legs and pricing.
tradeIt.openTrade({
  launch: {
    mode: 'trade',
    url: tradeUrl,
    config: {
      tradeType: TradeType.MultiLeg,
      ticker: 'MSFT',
      direction: OrderDirection.Debit,
      orderType: OrderType.Limit,
      limitPrice: 1.25,
      timeInForce: TimeInForce.GoodTillCanceled,
      legs: [
        {
          type: LegType.Option,
          action: TradeAction.Sell,
          positionEffect: PositionEffect.Open,
          occ: '270617C00390000',
          quantity: 5,
        },
        {
          type: LegType.Option,
          action: TradeAction.Buy,
          positionEffect: PositionEffect.Open,
          occ: '270617C00420000',
          quantity: 5,
        },
      ],
    },
  },
});
Config Parameters (launch.config)
Configure a particular trade using the parameters below:
See all enum values on SDK Enums Reference.
| Field | Meaning | Type / Enum | Used In | Default | Notes |
|---|---|---|---|---|---|
ticker | Asset symbol | string | simple options | None | Required. Example: AAPL, BTC-USD |
tradeType | Trade type | TradeType | simple options | TradeType.Simple | Use TradeType.MultiLeg for options/multi-leg |
action | Buy or sell | TradeAction | simple | TradeAction.Buy | Simple trades only |
amount | Trade amount | number | simple | 100 | Interpreted by unit |
unit | Amount unit | TradeUnit | simple | TradeUnit.Dollars | Dollars or Shares |
orderType | Order type | OrderType | simple options | OrderType.Market | market, limit, stop, stop_limit |
limitPrice | Limit price | number | simple options | None | Used for limit / stop_limit |
stopPrice | Stop trigger price | number | simple options | None | Used for stop / stop_limit |
timeInForce | Order duration | TimeInForce | simple options | TimeInForce.Day | Day, GoodTillCanceled, ImmediateOrCancel, FillOrKill |
direction | Net options price direction | OrderDirection | options | None | Use Debit, Credit, or Even; required for priced multi-leg orders. |
takeProfit | Attached take-profit exit | TradeItExitTrigger | simple Buy | None | Closes the resulting long position at a gain. Use TriggerUnit.Price or TriggerUnit.Percent. Support varies by brokerage. |
stopLoss | Attached stop-loss exit | TradeItExitTrigger | simple Buy | None | Closes the resulting long position at a loss. Use TriggerUnit.Price or TriggerUnit.Percent. Support varies by brokerage. |
legs | Options leg payload | TradeItMultiLegTradeLegConfig[] | options | None | Required for options/multi-leg trades |
legs[].type | Leg type | LegType | options | None | Option or Equity |
legs[].action | Leg action | TradeAction | options | None | Buy or Sell |
legs[].positionEffect | Position effect | PositionEffect | null | options | null | Usually Open / Close; null for equity legs |
legs[].occ | OCC contract string | string | null | options | None | Required for option legs |
legs[].quantity | Leg quantity | number | options | 1 | Contracts for options, shares for equity legs |
Trade through your server
Use this path if your platform owns the order form and review screen. All API calls use the current user's OAuth token on your server.
- Read accounts and have the user select the account.
- Prepare an order with Create trade or Create options trade.
- Display the returned order's account, symbol, side, quantity, prices, order type, and any option legs. Require explicit approval for that specific order.
- In a separate authenticated, CSRF-protected confirmation handler, submit the approved draft using Execute trade.
- Read Get trades for order status; an accepted order may not have filled. Offer Cancel trade where eligible.
Check automatic execution before creating an order
Accounts configured for automatic execution may submit an order during create_trade or create_options_trade. Use accounts with automatic execution disabled for a draft-first flow. If automatic execution is enabled, obtain explicit approval of the exact order before the create call. Always inspect the returned status; do not execute an already submitted order.
For example, prepare a limit order from your server with the user's selected account_id:
{
  "toolName": "create_trade",
  "params": {
    "symbol": "AAPL",
    "account_id": 304,
    "buy_or_sell": "buy",
    "amount": 1,
    "unit": "shares",
    "order_type": "limit",
    "limit_price": 150,
    "time_in_force": "day"
  }
}
Send this JSON to POST https://api.tradeit.app/api/tool/execute with Authorization: Bearer <user_access_token>. Replace 304 with the selected Trade It account ID and the sample order fields with the user's intended order.
After review and approval, the confirmation handler sends a separate request to the same endpoint:
{
  "toolName": "execute_trade",
  "params": { "trade_id": 842 }
}
Replace 842 with the returned draft's id. Bind the saved draft and approval to the current platform user; re-review if any order details change. Prevent duplicate confirmation requests and check order status before retrying a submission after a network timeout.